The Sapin headband, a free knitting headband pattern
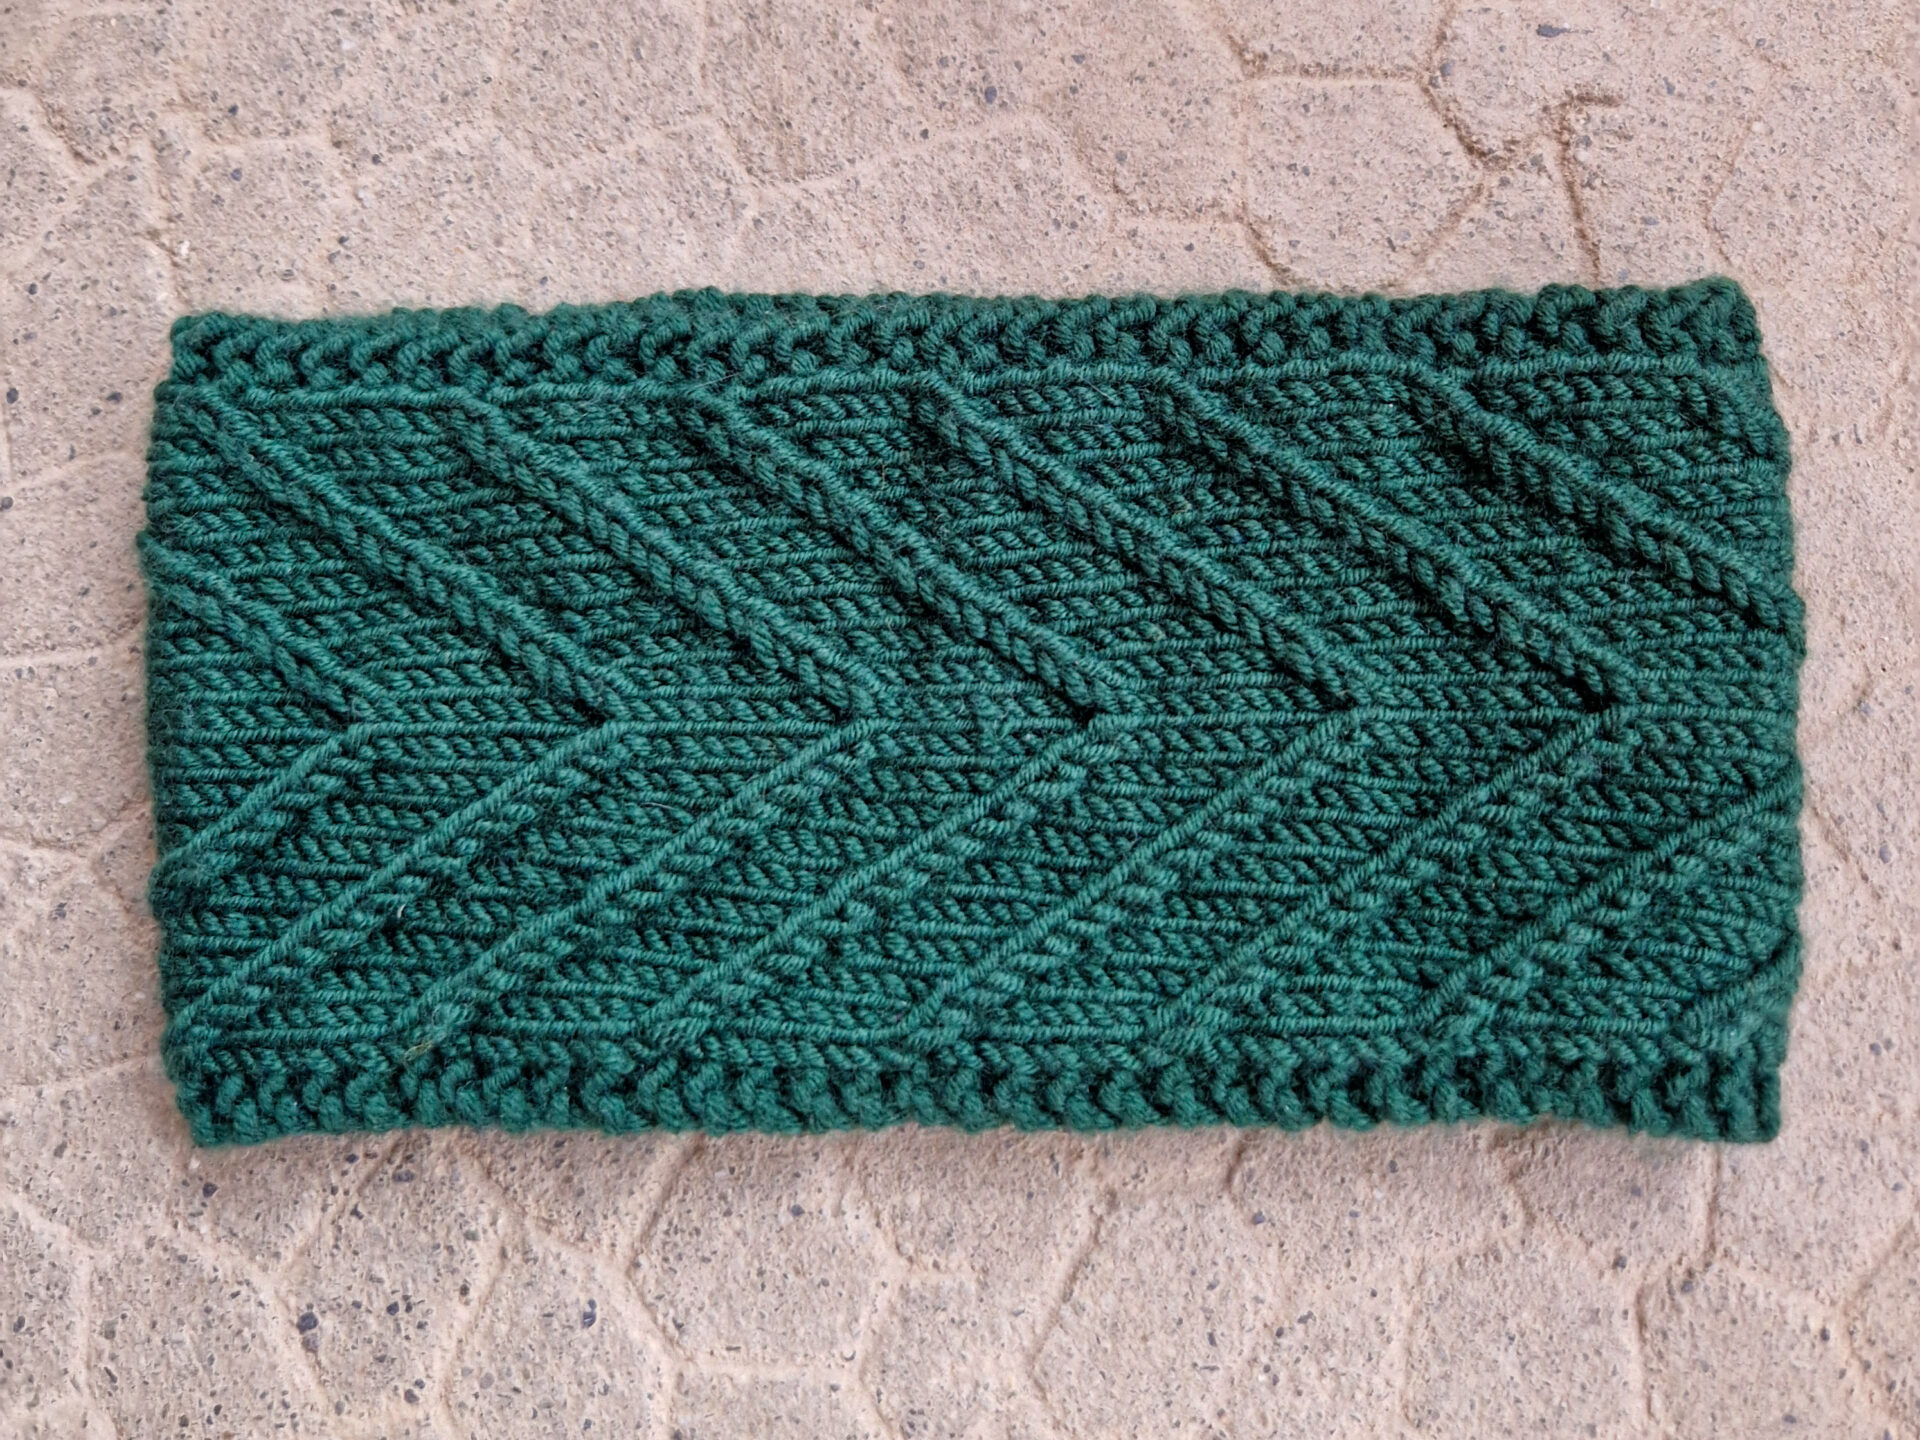
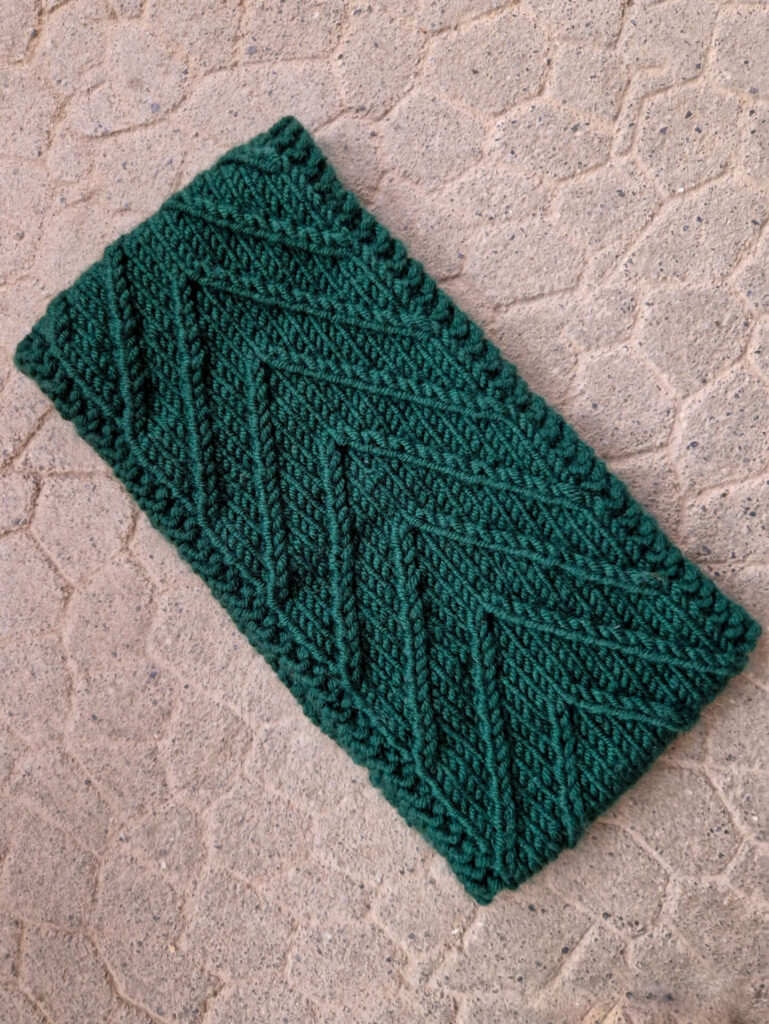
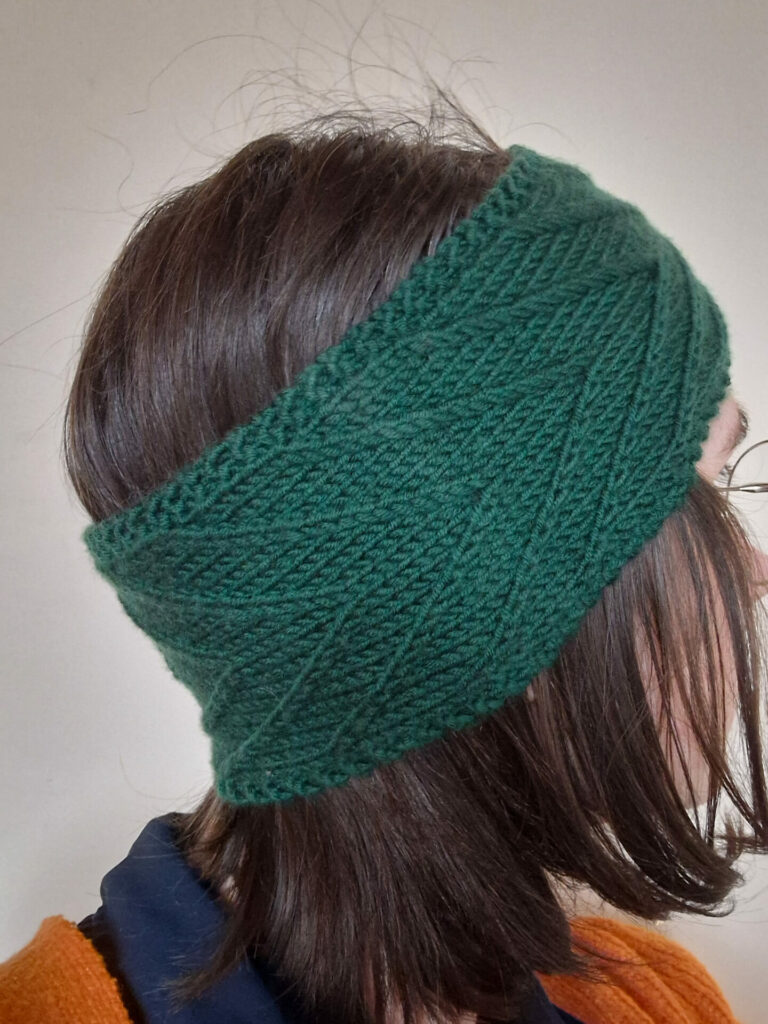
Hello! The cold days are back, and knitting needles are in full swing preparing Christmas gifts. So, it’s the perfect time to offer you a new free pattern! Today, I’m excited to introduce the Sapin Headband knitting pattern. This headband has a twisted line effect, but no cable needles are required! As always, it’s very easy to knit. Read on to learn how to make this new headband!
Discover my other free patterns here.
1 – The story of the Sapin knitted headband
Imagining this headband came from a request by my cousin while she was visiting me on holiday. She wanted a lovely pine-green headband—her color of the year! There was no rush at all, but I still rushed to the nearest yarn store to try and create her headband before her vacation ended.
For this pine-colored headband, I wanted a design that also evoked the majestic tree itself. So, I came up with a pattern featuring the pointed shape of a beautiful pine tree from the Alpine forests.
The name of the pattern, Sapin, is the French word for the most famous pine tree in France.
The yarn
For this pine-green knitted headband, I used less than one skein of Katia’s Merino Sport. It’s a soft, thick yarn made of 100% merino wool. To be honest, I picked it a bit randomly as it was the only pine-green yarn in the store, but I ended up being very happy knitting with it!
2 – Materials for the Sapin Knitted Headband
- 1 ball (50g) of Aran-weight yarn
- A pair of 4.5mm knitting needles (your preferred type, as the headband is knit flat – A yarn needlepersonally, I chose circular needles)
- Une aiguille à laine
For the provisional cast-on (optional):
- 1 crochet hook
- A leftover piece of yarn about 40cm long, in a color contrasting with your knitting.
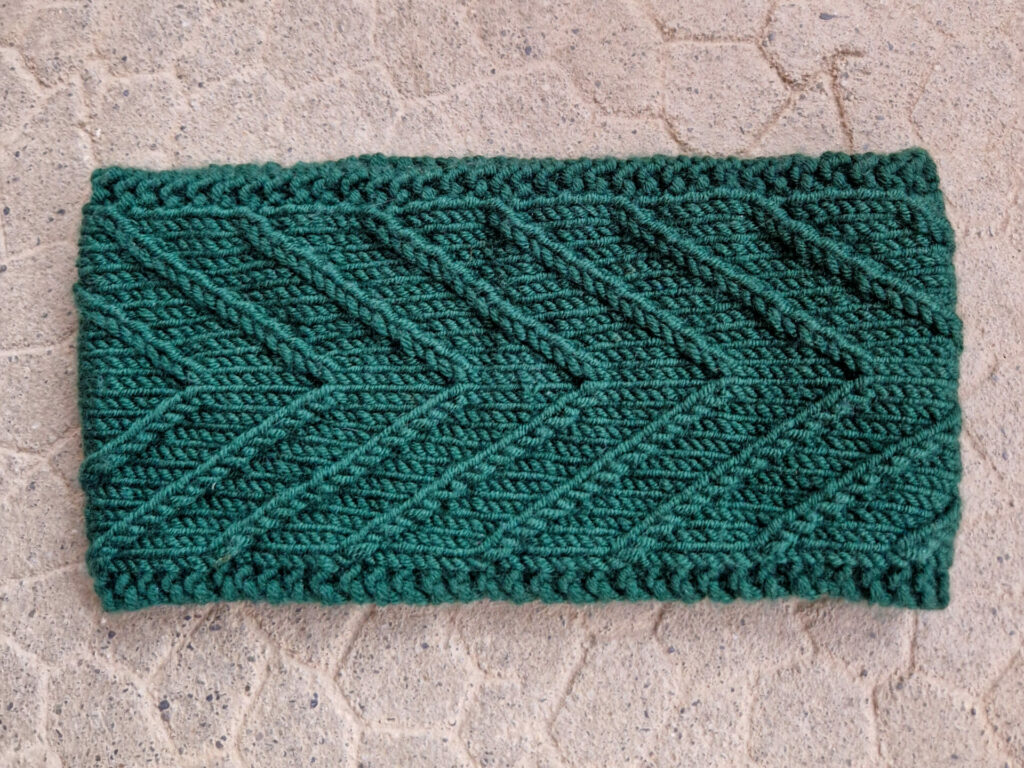
The headband is about 45cm long and 9-10cm wide.
3 – Abbreviations and Techniques used
- k: knit
- p: purl
- LT (left twist): Left twist stitch: Slip 2 stitches as if to knit them, then place them back on the left needle. Knit the second stitch on the left needle through the back loop. Do not drop it from the needle. Knit the first two stitches on the left needle together through the back loop, then drop both stitches from the needle. Check the video tutorial here.
- RT (right twist): Right twist stitch: Knit 2 stitches together without dropping them from the needle. Then knit into the first stitch on the left needle. Drop both stitches from the left needle. Check the video tutorial here.
PS: I discovered the twisted stitches technique on LizzyKnits’ YouTube channel, after a lot of research.

Cast on
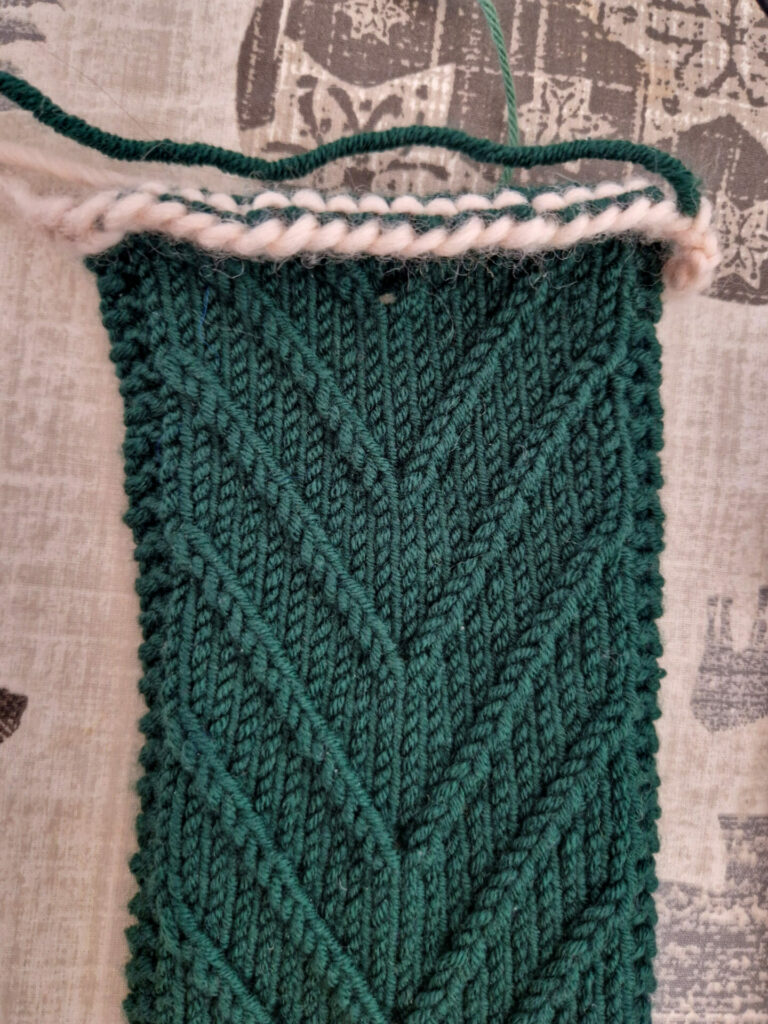
For this knitted headband pattern, you can chose between two types of cast-ons: a long-tail cast-on or a provisional cast-on. There isn’t a significant difference between the two, but you might prefer the provisional cast-on if, like me, you don’t enjoy sewing at the end of your knits.
The long-tail cast on is much simpler, but you’ll need to sew the two ends of the headband together at the end. To learn how to perform a long-tail cast on, check out a video tutorial here. The sewing may be slightly more noticeable depending on your sewing skills.
The provisional cast on is more complicated (it took me a few tries to get it right) and requires a crochet hook and some scrap yarn. However, it allows you to join the ends more neatly using kitchener’s stitch. For a relatively simple method of provisional cast on (no need to make a chain with the crochet), I recommend the one described by Purl Soho.
The main pattern of the Sapin Knitted Headband
The design of the Sapin headband is simple and elegant. The headband is primarily knit in stockinette stitch (knit flat). It features fine garter stitch edges. A textured design is created using twisted stitches.
To help you get into the pattern, I have made a video showing you how to knit the first row.
To adjust the width of the pattern, here are two suggestions:
- You can simply use thinner needles.
- You can knit only rows 3 to 10, shifting the garter stitch bands by one stitch on each side.
4 – The pattern of the Sapin headband
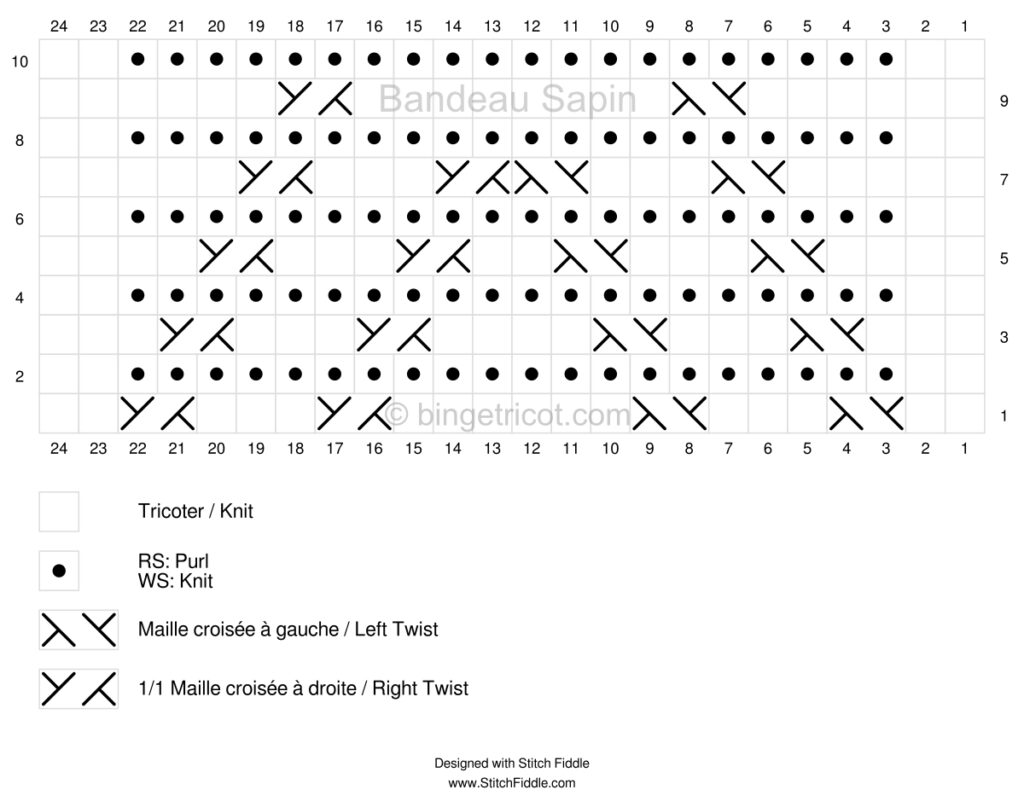
Cast on 24 stitches using your preferred method and 4.5mm needles.
The headband consists of a repeat of 10 rows.
Row 1: k2, LT, k3, LT, k6, RT, k3, RT, k2.
Rows 2, 4, 6, 8, and 10: k2, p20, k2.
Row 3: k3, LT, k3, LT, k4, RT, k3, RT, k3.
Row 5: k4, LT, k3, LT, k2, RT, k3, RT, k4.
Row 7: k5, LT, k3, LT, RT, k3, RT, k5.
Row 9: k6, LT, k8, RT, k6.
Repeat these 10 rows 13 times, or until the headband measures approximately 45cm in length (or your desired length).
Tip: For the headband to fit your size, it should measure approximately 5-10 cm less than your head circumference.
Finishing the Headband
Then, to finish the headband, it will depend on your cast on choice.
- If you used a long-tail cast on: you can cast off, then sew the two ends of the headband together, and weave in the ends.
- If you used a provisional cast on : you can undo the cast on stitch by stitch and place the stitches on your other knitting needle. Then you can join the 2 sides with Kitchener’s stitch. And finally, weave in the ends.
- Explanations for the knitchener’s stitch are available here.
Thank you for reading this pattern, I hope you like it! You can find my other free patterns on my Ravelry Page.
Don’t forget to share your projects on social media with #bandeausapin #bingetricot and #sapinheadband
Do you want more patterns like this one? Fill in this quick survey to help me find out what you would like!
You can also add your projects on Ravelry here:

Partager :
- Cliquez pour partager sur Facebook(ouvre dans une nouvelle fenêtre) Facebook
- Cliquez pour partager sur Pinterest(ouvre dans une nouvelle fenêtre) Pinterest
- Cliquer pour partager sur X(ouvre dans une nouvelle fenêtre) X
- Cliquez pour partager sur WhatsApp(ouvre dans une nouvelle fenêtre) WhatsApp
- Cliquer pour envoyer un lien par e-mail à un ami(ouvre dans une nouvelle fenêtre) E-mail
- Cliquer pour imprimer(ouvre dans une nouvelle fenêtre) Imprimer
